安卓源码解析之AlertDialog

注:下列源码版本为8.0

AlertDialog的使用

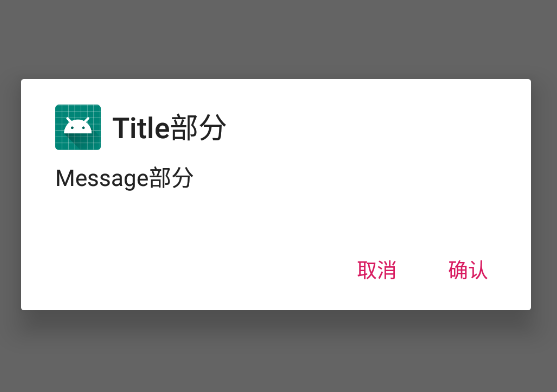
首先回顾下AlertDialog简单使用方法。设置图片,标题,内容,确认和取消按钮,最后调用show()显示出来。

1
2
3
4
5
6
7
8
9
10
11
12
13
14
15
16
17
18
19
AlertDialog.Builder builder = new AlertDialog.Builder(this);
builder.setIcon(R.mipmap.ic_launcher)
.setMessage("Message部分")
.setTitle("Title部分")
.setPositiveButton("确认", new DialogInterface.OnClickListener() {
@Override
public void onClick(DialogInterface dialogInterface, int i) {
//确认按钮的响应
dialog.dismiss();
}
})
.setNegativeButton("取消", new DialogInterface.OnClickListener() {
@Override
public void onClick(DialogInterface dialogInterface, int i) {
//取消按钮的响应
dialog.dismiss();
}
})
.show();

运行效果如下:

AlertDialog源码解析

AlertDialog

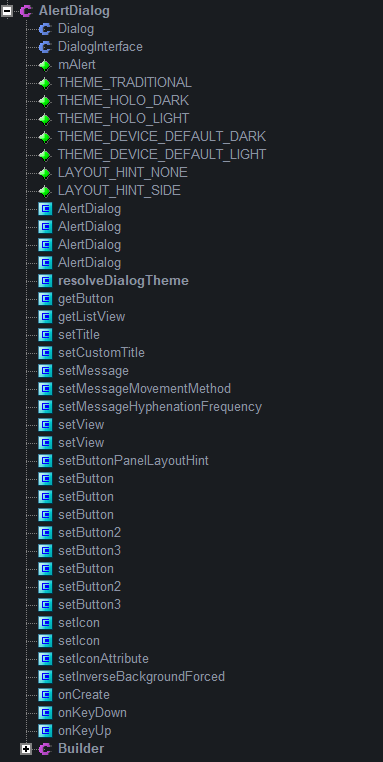
先整体了解下AlertDialog类的结构。可以大致分为6部分。

  • 父类Dialog
  • 实现的接口DialogInterface
  • AlertDialog的成员变量
  • AlertDialog的构造方法
  • AlertDialog的方法
  • 内部类Builder

接下来我们一步一步深入了解各部分相关知识。首先是AlertDialog类里面的。

成员变量

mAlert
1
2
@UnsupportedAppUsage
private AlertController mAlert;

这个是AlertController类型的变量。具体AlertControll的介绍会在下面讲到,这里我们只需要记住AlertControll是AlertBuilder的核心控制类,对AlertDialog的设置都是通过调用mAlert的方法实现的。

主题变量
1
2
3
4
5
6
7
8
9
public static final int THEME_TRADITIONAL = 1; //传统主题

public static final int THEME_HOLO_DARK = 2; //深色HOLO主题

public static final int THEME_HOLO_LIGHT = 3; //浅色HOLO主题

public static final int THEME_DEVICE_DEFAULT_DARK = 4; //默认的深色Device主题

public static final int THEME_DEVICE_DEFAULT_LIGHT = 5; //默认的浅色Device主题

这里分别是五个主题,传统、深色HOLO,浅色HOLO,默认深色Device和默认浅色Device主题。

提示布局
1
2
public static final int LAYOUT_HINT_NONE = 0; //没有提示布局
public static final int LAYOUT_HINT_SIDE = 1; //在一侧的布局提示

构造方法

1
2
3
4
5
6
7
8
9
10
11
12
13
14
15
16
17
18
19
20
21
22
  protected AlertDialog(Context context) {
this(context, 0); //0表示使用系统默认的风格
}
//点击外部是否可取消,取消时候的回调
protected AlertDialog(Context context, boolean cancelable, OnCancelListener cancelListener) {
this(context, 0);
setCancelable(cancelable); //是否能取消
setOnCancelListener(cancelListener);//设置取消键的监听器
}
// 创建一个使用显式主题资源的对话框
protected AlertDialog(Context context, @StyleRes int themeResId) {
this(context, themeResId, true);
}

AlertDialog(Context context, @StyleRes int themeResId, boolean createContextThemeWrapper) {
super(context, createContextThemeWrapper ? resolveDialogTheme(context, themeResId) : 0,
createContextThemeWrapper);

mWindow.alwaysReadCloseOnTouchAttr();
//构造出实例
mAlert = AlertController.create(getContext(), this, getWindow());
}

通过代码中我们可以发现AlertDialog的构造函数都是用protected或者默认来修饰,这就意味着我们不能直接通过new操作来创建AlertDialog的实例。通过一开始的使用我们可以知道,正常我们是通过Builder类来构造一个AlertDialog的实例的。而Builder的分析下面会细讲。

构造方法主要是传入上下文Context,Cancel监听器,样式(这个传入由父类Dialog处理,正常情况下默认为0,即系统指定的样式)。然后三个protected修饰的构造方法都调用了默认的构造方法,这个构造方法为真正的实现。在这个方法中createContextThemeWrapper是传给父类Dialog的,这个涉及到Dialog中的ContextThemeWrapper(Context一个包装类),这里可以暂时不管。resolveDialogTheme为解析主题方法,为AlertDialog的静态方法。然后构造核心控制类的实例。

方法

resolveDialogTheme

这里方法的主要工作就是根据构造方法传入的主题常量,对应相应的主题资源id。

1
2
3
4
5
6
7
8
9
10
11
12
13
14
15
16
17
18
19
20
21
//解析主题风格
static @StyleRes int resolveDialogTheme(Context context, @StyleRes int themeResId) {
if (themeResId == THEME_TRADITIONAL) {
return R.style.Theme_Dialog_Alert;
} else if (themeResId == THEME_HOLO_DARK) {
return R.style.Theme_Holo_Dialog_Alert;
} else if (themeResId == THEME_HOLO_LIGHT) {
return R.style.Theme_Holo_Light_Dialog_Alert;
} else if (themeResId == THEME_DEVICE_DEFAULT_DARK) {
return R.style.Theme_DeviceDefault_Dialog_Alert;
} else if (themeResId == THEME_DEVICE_DEFAULT_LIGHT) {
return R.style.Theme_DeviceDefault_Light_Dialog_Alert;
} else if (ResourceId.isValid(themeResId)) {
// start of real resource IDs.
return themeResId;
} else {//即0,使用系统指定的主题
final TypedValue outValue = new TypedValue();
context.getTheme().resolveAttribute(R.attr.alertDialogTheme, outValue, true);
return outValue.resourceId;
}
}
get系列方法

主要有两个,一个是获取对话框的按钮,比如BUTTON_POSITIVE。一个是获取对话框中的ListView列表。

1
2
3
4
5
6
7
8
 //根据位置返回对话框的按钮
public Button getButton(int whichButton) {
return mAlert.getButton(whichButton);
}
//得到对话框中的listView
public ListView getListView() {
return mAlert.getListView();
}
set系列方法

这个系列方法有很多,但是最后都是在里面调用mAlert的方法来实现。这里只贴出一部分。

1
2
3
4
5
6
7
8
9
10
11
12
13
14
15
16
17
18
19
20
	//设置标题
@Override
public void setTitle(CharSequence title) {
super.setTitle(title);
mAlert.setTitle(title);
}

/**
* 设置自定义视图为标题
* @see Builder#setCustomTitle(View)
*/
public void setCustomTitle(View customTitleView) {
mAlert.setCustomTitle(customTitleView);
}

//设置显示的消息
public void setMessage(CharSequence message) {
mAlert.setMessage(message);
}
......
onCreate

这里主要是对mAlert进行初始化。

1
2
3
4
5
6
//初始化AlertController
@Override
protected void onCreate(Bundle savedInstanceState) {
super.onCreate(savedInstanceState);
mAlert.installContent();
}
key方法

按键事件,如果AlertController不处理则交给父类Dialog处理。

1
2
3
4
5
6
7
8
9
10
11
@Override
public boolean onKeyDown(int keyCode, KeyEvent event) {
if (mAlert.onKeyDown(keyCode, event)) return true;
return super.onKeyDown(keyCode, event);
}

@Override
public boolean onKeyUp(int keyCode, KeyEvent event) {
if (mAlert.onKeyUp(keyCode, event)) return true;
return super.onKeyUp(keyCode, event);
}

分析完AlertDialog的方法后,我们就来重点分析使用AlertDialog最常见也是AlertDialog中很重要的内部类Builer。

Builder

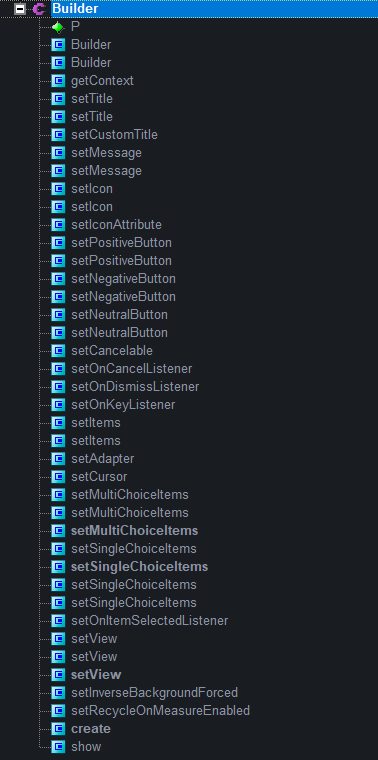
还是老规矩,先了解下Builder的整体结构,主要分为三个部分来进行分析:

  • 成员变量
  • 构造方法
  • 方法

P

1
2
@UnsupportedAppUsage
private final AlertController.AlertParams P;

可以发现在内部类中成员变量只有一个,P是AlertController的内部类AlertParams类型的变量。AlertParams中包含了与AlertDialog视图中对应的成员变量,P的主要作用就是保存Builder的一些设置参数。

构造方法

1
2
3
4
5
6
7
8
public Builder(Context context) {
this(context, resolveDialogTheme(context, ResourceId.ID_NULL));
}
public Builder(Context context, int themeResId) {
//实例化
P = new AlertController.AlertParams(new ContextThemeWrapper(
context, resolveDialogTheme(context, themeResId)));
}

在这里构造方法有两个,我们经常使用的就是第一个,传入上下文Context(正常是活动的上下文),默认的主题id为ResourceId.ID_NULL,即0,故默认的主题风格是系统指定的风格。然后调用具体实现的构造方法。第二个构造方法为具体实现,可以指定风格,并实例化P。

方法

get方法
1
2
3
public Context getContext() {
return P.mContext;
}

在Builder类中get方法只有一个getContext, 为Dialog返回一个在Builder创建时有其对应主题的Context。程序会使用这个Context去获取LayoutInflater,然后去载入一个用于显示在正在生成的dialog的使用正确主题的视图。

set系列方法
1
2
3
4
5
6
7
8
9
10
11
12
13
14
15
16
17
18
19
20
21
22
23
24
25
26
27
28
29
    public Context getContext() {
return P.mContext;
}

public Builder setTitle(@StringRes int titleId) {
P.mTitle = P.mContext.getText(titleId);
return this;
}

public Builder setTitle(CharSequence title) {
P.mTitle = title;
return this;
}

public Builder setCustomTitle(View customTitleView) {
P.mCustomTitleView = customTitleView;
return this;
}

public Builder setMessage(@StringRes int messageId) {
P.mMessage = P.mContext.getText(messageId);
return this;
}

public Builder setMessage(CharSequence message) {
P.mMessage = message;
return this;
}
......

从这些方法可以看到在builder设置的参数都保存到了P的对应的成员变量中,并且这些方法都是返回Builder的,故我们可以使用Builder的构造链来进行连续传参。P存在之后,我们就可以创建对话框了。让我们继续分析应该如何创建对话框。

create
1
2
3
4
5
6
7
8
9
10
11
12
13
14
15
public AlertDialog create() {
// Context has already been wrapped with the appropriate theme.
final AlertDialog dialog = new AlertDialog(P.mContext, 0, false);
P.apply(dialog.mAlert);//将保存在p的参数赋给dialog对象的mAlert
dialog.setCancelable(P.mCancelable);
if (P.mCancelable) {
dialog.setCanceledOnTouchOutside(true);
}
dialog.setOnCancelListener(P.mOnCancelListener);
dialog.setOnDismissListener(P.mOnDismissListener);
if (P.mOnKeyListener != null) {
dialog.setOnKeyListener(P.mOnKeyListener);
}
return dialog;
}

创建AlertDialog的实例,并将保存在P的设置参数赋值给dialog对象的mAlert中。这时候知识创建了对话框,但是还不能将对话框显示出来,故接下去看show的方法。

show
1
2
3
4
5
public AlertDialog show() {
final AlertDialog dialog = create();
dialog.show();
return dialog;
}

在show方法中调用create得到AlertDialog对象,然后调用对象的show方法,将对话框显示出来。

至此我们已经分析完AlertDialog类中的相关知识。欸,等等AlertControll核心控制类呢?Dialog类呢?看来革命尚未成功啊!让我们来继续分析!


AlertDialog的加载绘制流程

create

通过上面的分析我们知道在创建AlertDialog对象时,需要将参数P赋值到对象的mAlert中。

1
2
final AlertDialog dialog = new AlertDialog(P.mContext, 0, false);
P.apply(dialog.mAlert);//将保存在p的参数赋给dialog对象的mAlert

在这里通过new来创建一个AlertDialog对象,来回顾下AlertDialog的最重要的构造方法。

1
2
3
4
5
6
7
  AlertDialog(Context context, @StyleRes int themeResId, boolean createContextThemeWrapper) {
super(context, createContextThemeWrapper ? resolveDialogTheme(context, themeResId) : 0,
createContextThemeWrapper);
mWindow.alwaysReadCloseOnTouchAttr();
//构造出实例
mAlert = AlertController.create(getContext(), this, getWindow());
}

在这里我们可以很清楚的发现,这个构造方法调用了super,故我们需要看下Dialog的构造方法。

1
2
3
4
5
6
7
8
9
10
11
12
13
14
15
16
17
18
19
20
21
22
23
24
25
26
27
28
Dialog(@NonNull Context context, @StyleRes int themeResId, boolean createContextThemeWrapper) {
if (createContextThemeWrapper) {
if (themeResId == ResourceId.ID_NULL) {
final TypedValue outValue = new TypedValue();
context.getTheme().resolveAttribute(R.attr.dialogTheme, outValue, true);
themeResId = outValue.resourceId;
}
mContext = new ContextThemeWrapper(context, themeResId);
} else {
mContext = context;
}

mWindowManager = (WindowManager) context.getSystemService(Context.WINDOW_SERVICE);

final Window w = new PhoneWindow(mContext);
mWindow = w;
w.setCallback(this);
w.setOnWindowDismissedCallback(this);
w.setOnWindowSwipeDismissedCallback(() -> {
if (mCancelable) {
cancel();
}
});
w.setWindowManager(mWindowManager, null, null);
w.setGravity(Gravity.CENTER);

mListenersHandler = new ListenersHandler(this);
}

从Dialog的构造函数可以发现,直接new出了一个phoneWindow并赋值给mWindow,故当调用create创建AlertDialog对象时Dialog所需要的Window就有了。那么接下来就得分析Window如何与Dialog的视图进行关联呢?

apply

在AlertDialog创建后,就调用了apply这个方法,这个方法是在AlertController类中的方法,我们看一下这个方法。

1
2
3
4
5
6
7
8
9
10
11
12
13
14
15
16
17
18
19
20
21
22
23
24
25
26
27
28
29
30
31
32
33
34
35
36
37
38
39
40
41
42
43
44
45
46
47
48
49
50
51
public void apply(AlertController dialog) {
if (mCustomTitleView != null) {
dialog.setCustomTitle(mCustomTitleView);
} else {
if (mTitle != null) {
dialog.setTitle(mTitle);
}
if (mIcon != null) {
dialog.setIcon(mIcon);
}
if (mIconId != 0) {
dialog.setIcon(mIconId);
}
if (mIconAttrId != 0) {
dialog.setIcon(dialog.getIconAttributeResId(mIconAttrId));
}
}
if (mMessage != null) {
dialog.setMessage(mMessage);
}
if (mPositiveButtonText != null) {
dialog.setButton(DialogInterface.BUTTON_POSITIVE, mPositiveButtonText,
mPositiveButtonListener, null);
}
if (mNegativeButtonText != null) {
dialog.setButton(DialogInterface.BUTTON_NEGATIVE, mNegativeButtonText,
mNegativeButtonListener, null);
}
if (mNeutralButtonText != null) {
dialog.setButton(DialogInterface.BUTTON_NEUTRAL, mNeutralButtonText,
mNeutralButtonListener, null);
}
if (mForceInverseBackground) {
dialog.setInverseBackgroundForced(true);
}
// For a list, the client can either supply an array of items or an
// adapter or a cursor
if ((mItems != null) || (mCursor != null) || (mAdapter != null)) {
createListView(dialog);
}
if (mView != null) {
if (mViewSpacingSpecified) {
dialog.setView(mView, mViewSpacingLeft, mViewSpacingTop, mViewSpacingRight,
mViewSpacingBottom);
} else {
dialog.setView(mView);
}
} else if (mViewLayoutResId != 0) {
dialog.setView(mViewLayoutResId);
}
}

从这个方法可以看出,这个方法的任务很简单,就是将保存的参数赋值给dialog的mAlert参数。创建后如何show出来呢,我们知道在show方法中调用了dialog的show,那么dialog的show又是怎样的呢?

show

1
2
3
4
5
6
7
8
9
10
11
12
13
14
15
16
17
18
19
20
21
22
23
24
25
26
27
28
29
30
31
32
33
34
35
36
37
38
39
40
41
42
43
44
45
46
47
48
49
50
51
52
53
54
public void show() {
//如果弹窗已经show出来
if (mShowing) {

//如果顶级view存在则设置窗口window,并显示顶级View
if (mDecor != null) {
if (mWindow.hasFeature(Window.FEATURE_ACTION_BAR)) {
mWindow.invalidatePanelMenu(Window.FEATURE_ACTION_BAR);
}
mDecor.setVisibility(View.VISIBLE);
}
return;
}

mCanceled = false;
//如果窗口未被创建
if (!mCreated) {
dispatchOnCreate(null); //回调onCreate()方法
} else {
// Fill the DecorView in on any configuration changes that
// may have occured while it was removed from the WindowManager.
final Configuration config = mContext.getResources().getConfiguration();
mWindow.getDecorView().dispatchConfigurationChanged(config);
}

onStart();
mDecor = mWindow.getDecorView();

if (mActionBar == null && mWindow.hasFeature(Window.FEATURE_ACTION_BAR)) {
final ApplicationInfo info = mContext.getApplicationInfo();
mWindow.setDefaultIcon(info.icon);
mWindow.setDefaultLogo(info.logo);
mActionBar = new WindowDecorActionBar(this);
}

WindowManager.LayoutParams l = mWindow.getAttributes();
boolean restoreSoftInputMode = false;
if ((l.softInputMode
& WindowManager.LayoutParams.SOFT_INPUT_IS_FORWARD_NAVIGATION) == 0) {
l.softInputMode |=
WindowManager.LayoutParams.SOFT_INPUT_IS_FORWARD_NAVIGATION;
restoreSoftInputMode = true;
}

mWindowManager.addView(mDecor, l); //将DecorView添加到Window之中
if (restoreSoftInputMode) {
l.softInputMode &=
~WindowManager.LayoutParams.SOFT_INPUT_IS_FORWARD_NAVIGATION;
}

mShowing = true;

sendShowMessage();
}

通过阅读源码,我们可以发现AlertDialog调用的show方法其实是父类Dialog的show方法。在这个方法中首先要判断Dialog是否已经show过,如果已经show过就重新设置DecorView。如果窗口未被创建,就调用dispatchOnCreate(null)方法,这个方法在Dialog中,我们可以看看:

dispatchOnCreate

1
2
3
4
5
6
7
void dispatchOnCreate(Bundle savedInstanceState) {
if (!mCreated) {
onCreate(savedInstanceState);
mCreated = true;
}
}
protected void onCreate(Bundle savedInstanceState) {}

可以看出实际上就是回调Dialog的onCreate,而在Dialog的onCreate为空方法,具体实现为子类AlertDialog的onCreate方法。

1
2
3
4
5
@Override
protected void onCreate(Bundle savedInstanceState) {
super.onCreate(savedInstanceState);
mAlert.installContent();
}

其实在上面对AlertDialog的分析中我们已经得知AlertDialog的onCreate方法主要是对mAlert进行初始化,那么是如何进行初始化的呢?让我们瞧瞧AlertController中这个installContent方法。

installContent

1
2
3
4
5
public void installContent() {
int contentView = selectContentView();
mWindow.setContentView(contentView); //加载指定文件到DecorView的Content部分
setupView();//初始化布局的组件
}

这个方法负责的是Dialog的界面显示工作。其中contentView为窗口的总体布局,具体方法如下:

1
2
3
4
5
6
7
8
9
10
//得到布局id
private int selectContentView() {
if (mButtonPanelSideLayout == 0) {
return mAlertDialogLayout;
}
if (mButtonPanelLayoutHint == AlertDialog.LAYOUT_HINT_SIDE) {
return mButtonPanelSideLayout;
}
return mAlertDialogLayout;
}

这个方法就是布局选择,默认情况下返回mAlertDialogLayout。而mAlertDialogLayout在AlertController中的构造函数中进行初始化。

1
2
3
4
5
6
7
8
9
10
11
12
13
14
15
16
17
18
19
20
21
22
23
24
25
26
27
28
29
30
31
32
33
34
@UnsupportedAppUsage
protected AlertController(Context context, DialogInterface di, Window window) {
mContext = context;
mDialogInterface = di;
mWindow = window;
mHandler = new ButtonHandler(di);

//获得AlertDialog相关的属性集
final TypedArray a = context.obtainStyledAttributes(null,
R.styleable.AlertDialog, R.attr.alertDialogStyle, 0);
//获取不同布局在安卓系统中对应的id
mAlertDialogLayout = a.getResourceId(
R.styleable.AlertDialog_layout, R.layout.alert_dialog);
mButtonPanelSideLayout = a.getResourceId(
R.styleable.AlertDialog_buttonPanelSideLayout, 0);
mListLayout = a.getResourceId(
R.styleable.AlertDialog_listLayout, R.layout.select_dialog);

mMultiChoiceItemLayout = a.getResourceId(
R.styleable.AlertDialog_multiChoiceItemLayout,
R.layout.select_dialog_multichoice);
mSingleChoiceItemLayout = a.getResourceId(
R.styleable.AlertDialog_singleChoiceItemLayout,
R.layout.select_dialog_singlechoice);
mListItemLayout = a.getResourceId(
R.styleable.AlertDialog_listItemLayout,
R.layout.select_dialog_item);
mShowTitle = a.getBoolean(R.styleable.AlertDialog_showTitle, true);

a.recycle();

//默认没有标题栏,因为可以自行设置
window.requestFeature(Window.FEATURE_NO_TITLE);
}

有了布局后,在installContent中就执行 mWindow.setContentView(contentView),将这个布局添加到对应的Window中。添加后就开始进行布局组件的初始化,来看看setupView方法

setupView

1
2
3
4
5
6
7
8
9
10
11
12
13
14
15
16
17
18
19
20
21
22
23
24
25
26
27
28
29
30
31
32
33
34
35
36
37
38
39
40
41
42
43
44
45
46
47
48
49
50
51
52
53
54
55
56
57
58
59
60
61
62
63
64
65
66
67
68
69
70
71
72
73
74
75
76
77
78
79
80
81
82
83
84
85
86
87
88
89
90
91
92
93
94
95
private void setupView() {
final View parentPanel = mWindow.findViewById(R.id.parentPanel);
final View defaultTopPanel = parentPanel.findViewById(R.id.topPanel);
final View defaultContentPanel = parentPanel.findViewById(R.id.contentPanel);
final View defaultButtonPanel = parentPanel.findViewById(R.id.buttonPanel);

// Install custom content before setting up the title or buttons so
// that we can handle panel overrides.
final ViewGroup customPanel = (ViewGroup) parentPanel.findViewById(R.id.customPanel);
setupCustomContent(customPanel);

final View customTopPanel = customPanel.findViewById(R.id.topPanel);
final View customContentPanel = customPanel.findViewById(R.id.contentPanel);
final View customButtonPanel = customPanel.findViewById(R.id.buttonPanel);

// Resolve the correct panels and remove the defaults, if needed.
final ViewGroup topPanel = resolvePanel(customTopPanel, defaultTopPanel);
final ViewGroup contentPanel = resolvePanel(customContentPanel, defaultContentPanel);
final ViewGroup buttonPanel = resolvePanel(customButtonPanel, defaultButtonPanel);

setupContent(contentPanel);
setupButtons(buttonPanel);
setupTitle(topPanel);

final boolean hasCustomPanel = customPanel != null
&& customPanel.getVisibility() != View.GONE;
final boolean hasTopPanel = topPanel != null
&& topPanel.getVisibility() != View.GONE;
final boolean hasButtonPanel = buttonPanel != null
&& buttonPanel.getVisibility() != View.GONE;

// Only display the text spacer if we don't have buttons.
if (!hasButtonPanel) {
if (contentPanel != null) {
final View spacer = contentPanel.findViewById(R.id.textSpacerNoButtons);
if (spacer != null) {
spacer.setVisibility(View.VISIBLE);
}
}
mWindow.setCloseOnTouchOutsideIfNotSet(true);
}

if (hasTopPanel) {
// Only clip scrolling content to padding if we have a title.
if (mScrollView != null) {
mScrollView.setClipToPadding(true);
}

// Only show the divider if we have a title.
View divider = null;
if (mMessage != null || mListView != null || hasCustomPanel) {
if (!hasCustomPanel) {
divider = topPanel.findViewById(R.id.titleDividerNoCustom);
}
if (divider == null) {
divider = topPanel.findViewById(R.id.titleDivider);
}

} else {
divider = topPanel.findViewById(R.id.titleDividerTop);
}

if (divider != null) {
divider.setVisibility(View.VISIBLE);
}
} else {
if (contentPanel != null) {
final View spacer = contentPanel.findViewById(R.id.textSpacerNoTitle);
if (spacer != null) {
spacer.setVisibility(View.VISIBLE);
}
}
}

if (mListView instanceof RecycleListView) {
((RecycleListView) mListView).setHasDecor(hasTopPanel, hasButtonPanel);
}

// Update scroll indicators as needed.
if (!hasCustomPanel) {
final View content = mListView != null ? mListView : mScrollView;
if (content != null) {
final int indicators = (hasTopPanel ? View.SCROLL_INDICATOR_TOP : 0)
| (hasButtonPanel ? View.SCROLL_INDICATOR_BOTTOM : 0);
content.setScrollIndicators(indicators,
View.SCROLL_INDICATOR_TOP | View.SCROLL_INDICATOR_BOTTOM);
}
}

final TypedArray a = mContext.obtainStyledAttributes(
null, R.styleable.AlertDialog, R.attr.alertDialogStyle, 0);
setBackground(a, topPanel, contentPanel, customPanel, buttonPanel,
hasTopPanel, hasCustomPanel, hasButtonPanel);
a.recycle();
}

代码主要逻辑是根据标题,内容,按钮等添加到对应的布局中。根据设置来对布局进行显示和隐藏。最后让我们回到最初的Dialog的show方法中,执行完dispatchOnCreate之后又调用了onStart方法。然后调用以下三个方法最终将Dialog的界面绘制出来。

1
2
3
mDecor = mWindow.getDecorView();
WindowManager.LayoutParams l = mWindow.getAttributes();
mWindowManager.addView(mDecor, l); //将DecorView添加到Window之中

总结

AlertDialog跟Activity一样,内部有个Window。在日常情况下,我们首先构造出AlertDialog.Builder对象,然后设置各种属性,这些属性都被保存在AlertController.AlertParams类型的P中,调用Builder的create方法,在create首先构造出AlertDialog对象,构造的同时new PoneWindow对象赋值给AlertDialog的Window。对象构造后调用P.apply方法,将P中的参数设置赋值给AlertDialog对象的AlertController类型的mAlert中。然后我们会调用Builder的show方法来显示出Dialog,在show中会调用dispatchOnCreate方法来回调AlertDialog的onCreate方法,最终会走到setContentView将Window和Dialog的视图关联在一起,最终执行mWindow.addView方法,通过WindowManager将DecroView添加到Window中,于是Dialog显示在我们眼前。

-------------本文结束感谢您的阅读-------------